
RiskVision integrates with threat intelligence services through connectors. Customers with a valid license can access the CrowdStrike Falcon Intelligence Connector, the FireEye ISight Connector, and the Exploit Database Connector data in the Connectors page.
To set up and run the CrowdStrike Falcon Intelligence connector:
Navigate to the <RISKVISION_HOME>\config folder and add a valid license with the
connector.remote.crowdstrike.falconintelligenceconnector set to true.Download the SQUID Proxy.
- Install the SQUID Proxy server onto the machine that will be using RiskVision.
- To enable the proxy:
- Navigate to <RISKVISION_HOME>\config\agiliance.properties.
Make the following changes to the file:
Proxy.useProxyServer = true Proxy.serverHost = Server Hostname Proxy.serverPort = 3128 Proxy.httpType = http- Restart the RiskVision Tomcat service to apply these change.
- In the RiskVision Administration application, click on Administration, then Connectors.
 The Connectors page.
 - Click on CrowdStrike Falcon Intelligence Connector and then click Details.
- Click on the Configuration tab and then Edit.
 The Configuration tab for the CrowdStrike Falcon Intelligence Connector.
- Enter the Key and Secret Key.
- Click Save.
- Click on the Scheduled Jobs tab.
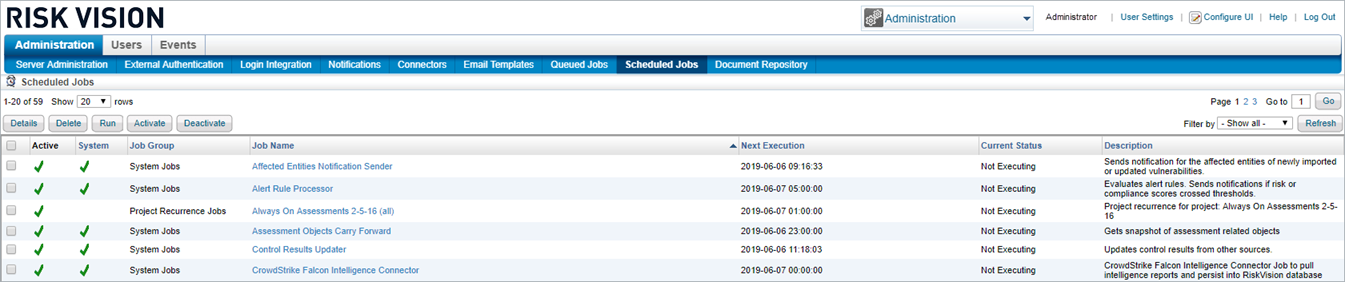 The Scheduled Jobs page.
 - Select the CrowdStrike Falcon Intelligence Connector scheduled job and click Activate, then Run. This will import threats through the proxy into RiskVision.

If the proxy has been turned off or configured improperly, you will see a message that reads: "Connection refused for proxy server: java.net.ConnectException: Connection refused: connect". - After successfully importing threats, click Deactivate.


To perform a threats import through the FireEye ISight connector:
Navigate to the <RISKVISION_HOME>\config folder and add a valid license with the
connector.remote.fireeye.isightconnector set to true.Download the SQUID Proxy.
- Install the SQUID Proxy server onto the machine that will be using RiskVision.
- To enable the proxy:
- Navigate to <RISKVISION_HOME>\config\agiliance.properties.
Make the following changes to the file:
Proxy.useProxyServer = true Proxy.serverHost = Server Hostname Proxy.serverPort = 3128 Proxy.httpType = http- Restart the RiskVision Tomcat service to apply these change.
- In the RiskVision Administration application, click on Administration, then Connectors.The Connectors page.
- Click on FireEye ISight Connector.
- Click on the Configuration tab and then Edit.
 The Configuration tab for the FireEye ISight Connector.
- Enter the Key and Secret Key.
- Specify the start date from which the threat data should be downloaded.
- Click Save.
- Click on the Scheduled Jobs tab. The Scheduled Jobs page.
- Select the FireEye ISight Connector scheduled job and click Activate, then Run. This will import threats through the proxy into RiskVision.
If the proxy has been turned off or configured improperly, you will see a message that reads: "Connection refused for proxy server: java.net.ConnectException: Connection refused: connect". - After successfully importing threats, click Deactivate.

To import exploits through the Exploit Database Connector:
Install and run the Exploit DB Connector.
Authenticate the Exploit Database in RiskVision.
Download the Java Cryptography Extension (JCE) Unlimited Strength Jurisdiction Policy file.
To enable the proxy:
Navigate to the <ExploitDBConnector_Home>\cfg directory.
Open connector.file.properties.
Make the following changes to the file:
Proxy.useProxyServer = true
Proxy.serverHost = Server Hostname
Proxy.serverPort = 3128
Proxy.httpType = http
Save the file.
To retrieve the Exploit Database connector file from Rackspace:
Run the following expressions for five minutes:
exploit.cron.expression= 0 0/5 * 1/1 * ?
exploit.encryption.secret.key=Enter Secret Key
riskvision.server.url=Url should be entered correctly
You can retrieve the cron.expression from the Cron Maker website. Save the file.
Go to the location where Java is installed on your machine and place the Advanced Encryption Standard supported local_policy.jar and US_export_policy.jar files in the $JDK_FOLDER/jre/lib/security directory.


