
Compensating controls are applied when an entity does not comply with one or more controls due to technical or business constraints. Putting the compensatory controls in place mitigates the associated risk; however, you must run an internal audit to confirm that there are no deficiencies. To compensate the non-performing controls, you can create a new control or select an existing control from your organization's controls library.
To add a compensating control
- Select an assessment, that your stakeholders have responded to the controls, to open its details page.
- On the Assessment Details page, click the Control Results tab.
- Select a control and then select New Compensating Control in the Actions drop-down list.
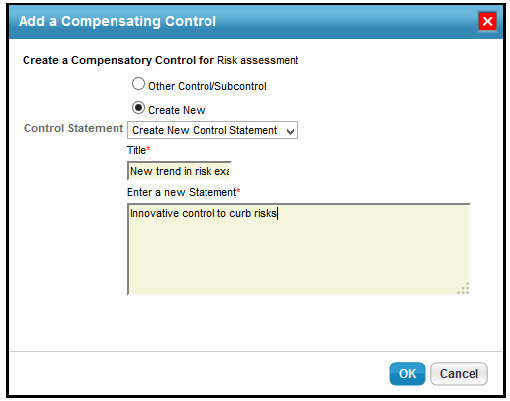
- The Add a Compensating Control dialog appears.

Do one of the following:
- By default, the Create New option is selected in the dialog. Enter a title and statement. This will create a new compensating control.
- Select Other Control/Subcontrol and click +.
The Select a Controls/Subcontrols dialog appears. Expand the groups or content packs beneath the Controls/SubControls folder, locate and select the compensating control, and then click OK to exit the Select a Controls/Subcontrols dialog. This will add an existing control from the controls library
- Click OK. The compensating control is added.
There are three error conditions we need to check for when a user tries to add a compensating control to a control:
- The same control as that which is being compensated cannot be added as a compensating control to itself.
- A compensating control that is identical to one already present for a given control should not be able to be added.
- A compensating control should not be able to compensate a control that itself is compensated.

