
This section provides instructions for upgrading a single-server RiskVision installation where Tomcat Application Server, Apache Web Server, Database and Report Server are installed on the same server. The RiskVision Server Upgrade Set-up installer only needs to be run once on the host server. This section also provides the upgrade instructions specific to this single-tier installations.
To upgrade a single-server installation:
- Copy the download files to the host server. See Downloading New Files for more information.
- Ensure that you have local administrator privileges on Windows Server 2008 or Windows Server 2012, User Account Control (UAC) is disabled, and all RiskVision services, such as MySQL, are running.
- Click Next.
- Double-click the RiskVisionApplicationServerUpgrade.exe file to launch the RiskVisionMulti-TierUpgradeInslater-InstallShield wizard.

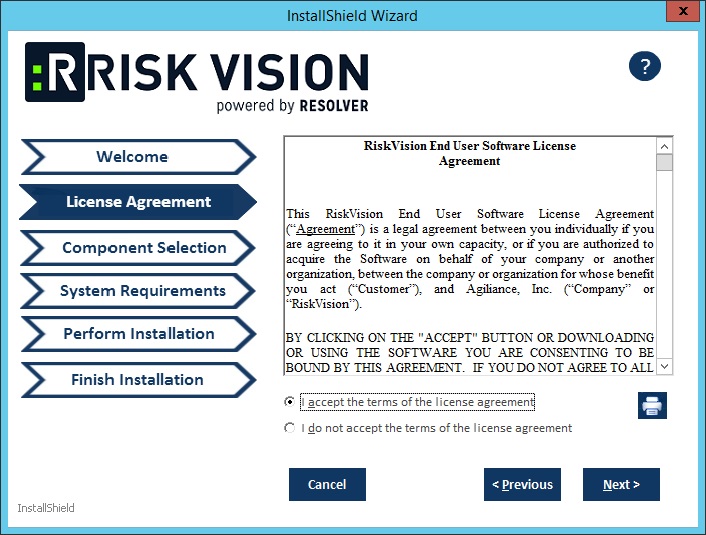
- Click Next.
- Click the I accept the terms in the license agreement radio button.
- Click Next.
- Check the Web Server (Apache HTTP Server), Application Server (Apache Tomcat), Database Server (MySQL or Oracle Database), and Report Server (TIBCO JasperReportServer) checkboxes.
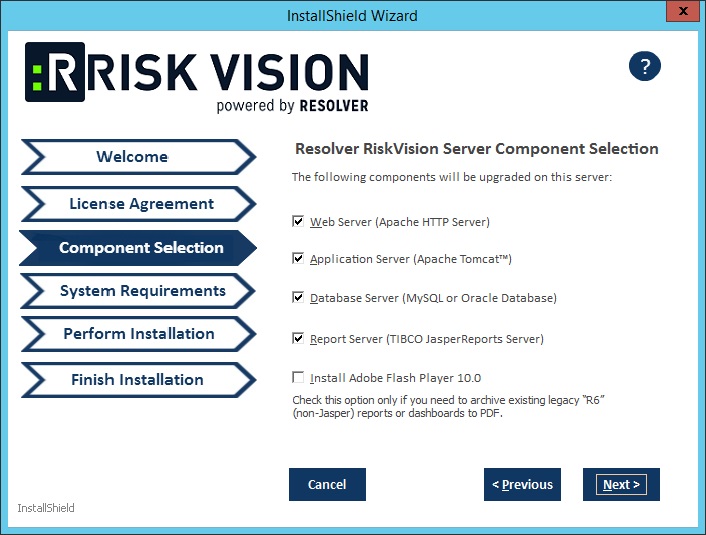
Click Next. If you select MySQL database, you will see the following window:
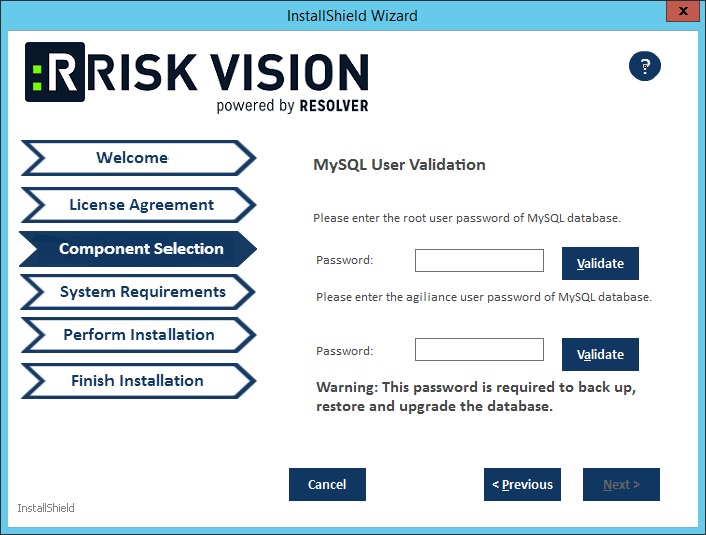
Enter the root password of the MySQL database in the Password field and click Validate. Enter the default RiskVision user password in the Password field and click Validate.
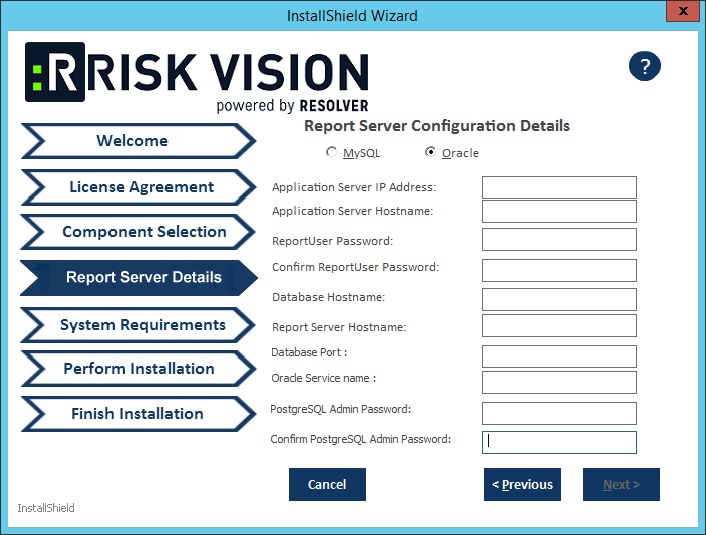
Click Next to open the Report Server Details wizard page.
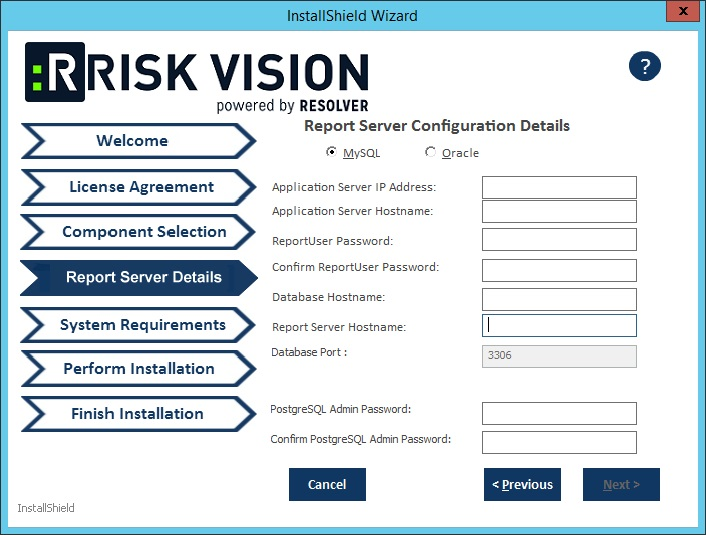
- Select the database type, either MySQL or Oracle.
- MySQL database:
- Click the Application Server IP Address field and enter the IP address of the RiskVision Server in which the application server is running.
- Click the Application Server Host Name field and enter the hostname of the RiskVision Server in which the application server is running.
- Enter the database reportuser password in the ReportUser Password field. Enter the same password in the ReportUser Confirm Password field. Memorize this password as you will need it when you set up the RiskVision Report Server, whether for a new installation or an upgrade.
- Enter the hostname of the database in the Database HostName field.
- Enter the fully qualified domain name of the RiskVision Report Server in the Report Server HostName field.
- Enter the database port in the Database Port field.
- Enter the PostgreSQL admin password in the PostgreSQL Admin Password field. Enter the same password in the Confirm PostgreSQL Admin Password field.
- Oracle database:
- Enter the IP address of the RiskVision Server in which the application server is running in the Application Server IP Address field.
- Enter the hostname of the RiskVision Server in which the application server is running in the Application Server Host Name field.
- Enter the database reportuser password in the ReportUser Password field. Enter the same password in the Confirm ReportUser Password field. Memorize this password as you will need it when you set up the RiskVision Report Server, whether for a new installation or an upgrade.
- Enter the hostname of the database in the Database HostName field.
- Enter the fully qualified domain name of the RiskVision Report Server in the Report Server HostName field.
- Enter the database port in the Database Port field.
- Enter the Oracle Service name, in the Oracle Service name field.
- Enter the PostgreSQL Admin password in the PostgreSQL Admin Password field. Enter the same password in the Confirm PostgreSQL Admin Password field.
- MySQL database:
Click Next.
Enter localhost as the hostname if the RiskVision is deployed on the server where you are currently running this upgrade installer.
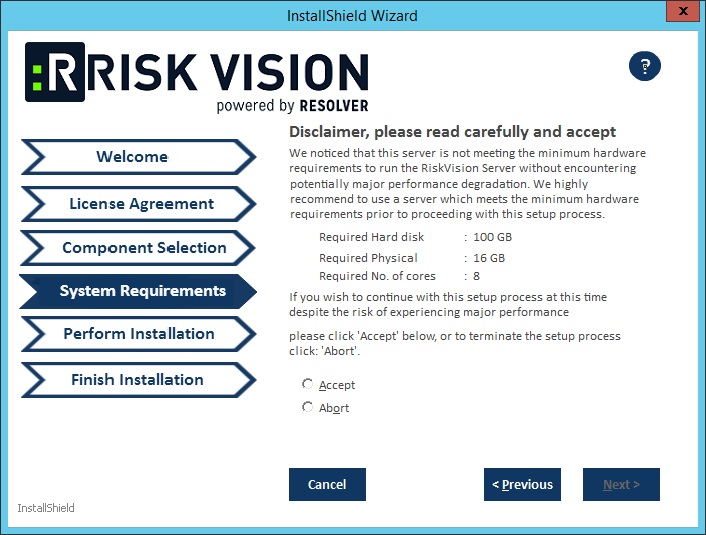
If your server does not meet the system and hardware requirements, the System Requirement wizard page will open. Continuing without meeting the system requirements could adversely affect performance. Consult the Minimum Hardware Requirements. To continue click Accept.
Click Install.
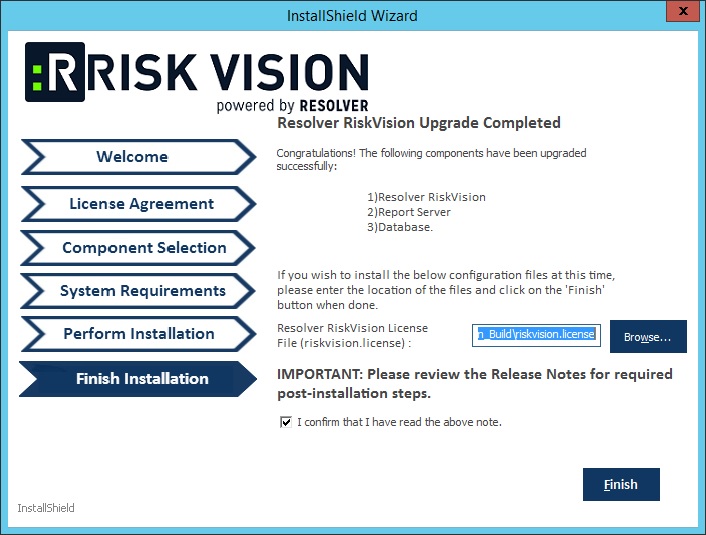
Review the Release Notes, then check the I confirm that I have read the above notes checkbox. Click Finish.


At this point, the upgrade process is complete. Depending on the size of your data, the upgrade may take four to five hours, but this is only an estimate.
A log of the upgrade process is written to the temporary directory where the upgrade installer is triggered.

