
A role defines what level of permissions the user has for each RiskVision application and which entities the user can access.
To create a new role:
In the Administration application, go to Users > Roles, and click New.
Enter a name for the role in the Name field.
Optional: If needed, enter an alternate display name for the role in the Display Name field. If this field is left blank, the display name will automatically be assigned the role name.
Optional: If this user needs to access the JasperReports Server, select the applicable role from the Jasper Role dropdown menu.
Optional: Enter a summary of the role in the Description field.
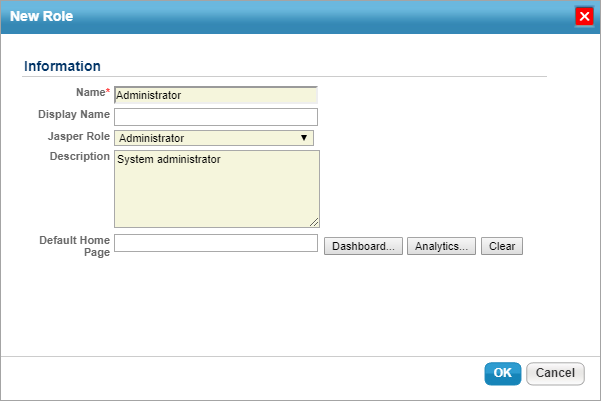 The New Role window.
- Optional: To select a dashboard or report to display on the Welcome page for users in this role:
- Click the Analytics... button beside the Default Home Page field.
- Click the + icon beside a folder in the tree to display sub-folders as needed.
- Navigate to the location of the report or dashboard you wish to select, then click the radio button to select it. If the report was recently added and is not appearing in the tree, click Refresh Repository to load it.
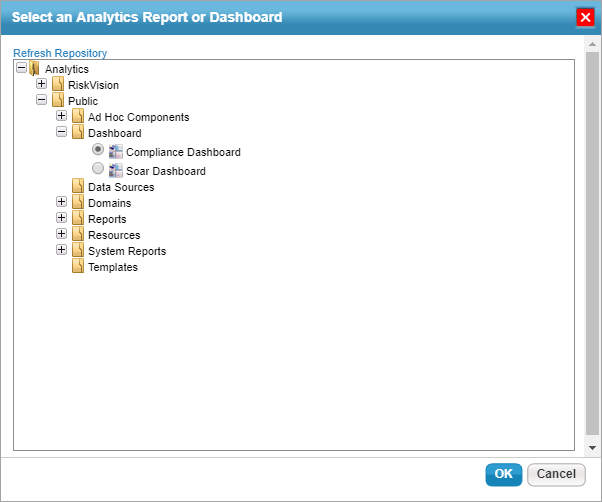
- Click OK to close the window.
Any selections made by end-users in the Dashboards settings will override any default home page selections made by an administrator.
- Click OK to save the role.


Once the role has been saved, you can modify its permissions. See the Configuring a Role article for more information.

