Create a Role in Jaspersoft
To create a new role in the Jasper Reports server:
- Login to Standalone as sysadmin.
- Navigate to Manage > Roles > Add Role...
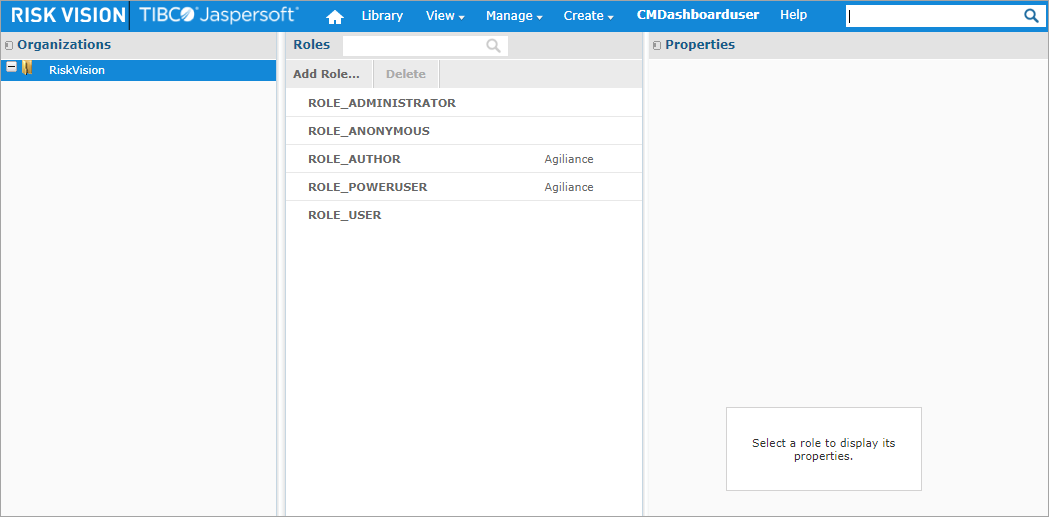 The Roles settings in Jaspersoft.
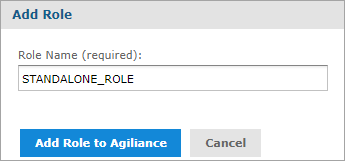
 - Enter a name for the role in the Role Name field, then click Add Role to Agiliance. Spaces and special characters are not permitted.
Adding a new role in Jaspersoft.
- In the Properties section to the right, select the RiskVision users to add to the role from the Users Available pane, then click the > arrow to add the users to the Users Assigned pane. To remove users, select them in the Users Assigned pane, then click the < arrow.
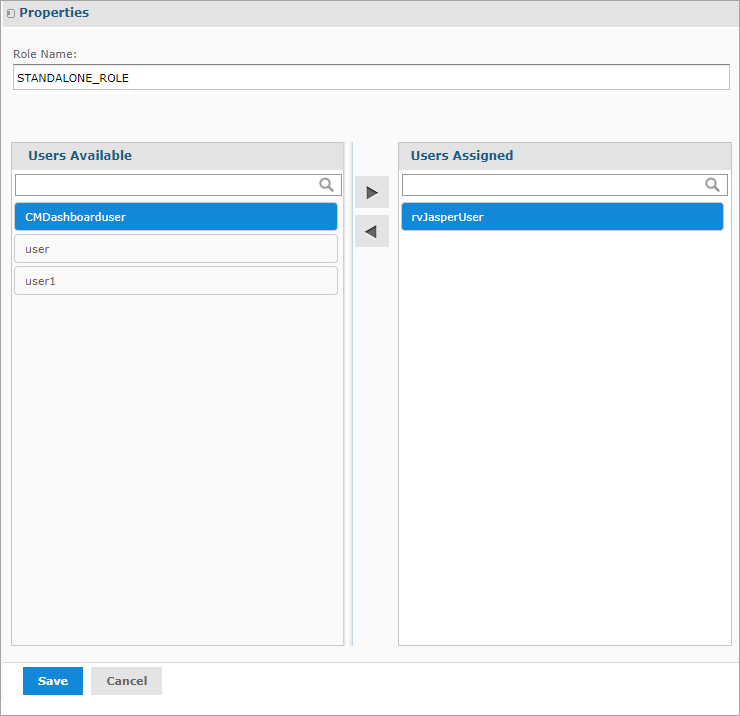
Assigning users to a role in Jaspersoft.
- Click Save.
- In RiskVision, navigate to Administration > Users > Roles.
- Create a role in RiskVision, ensuring a selection is made from the Jasper Role dropdown menu, and assigning permissions as required. See the Create a New Role article for more information.
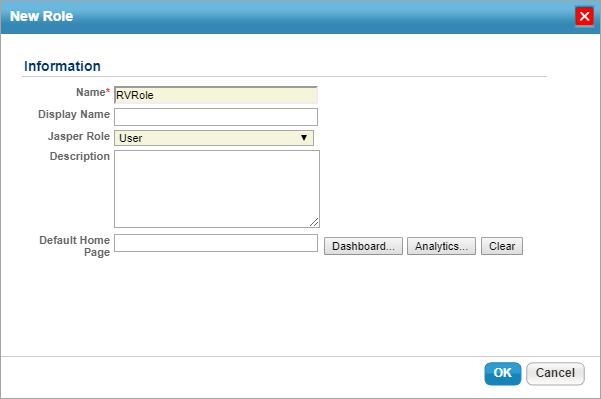
The New Role window in RiskVision.
- From the new role's settings, click Assigned Users > Add, then select the same user(s) added to the Jaspersoft role in step 4 above.
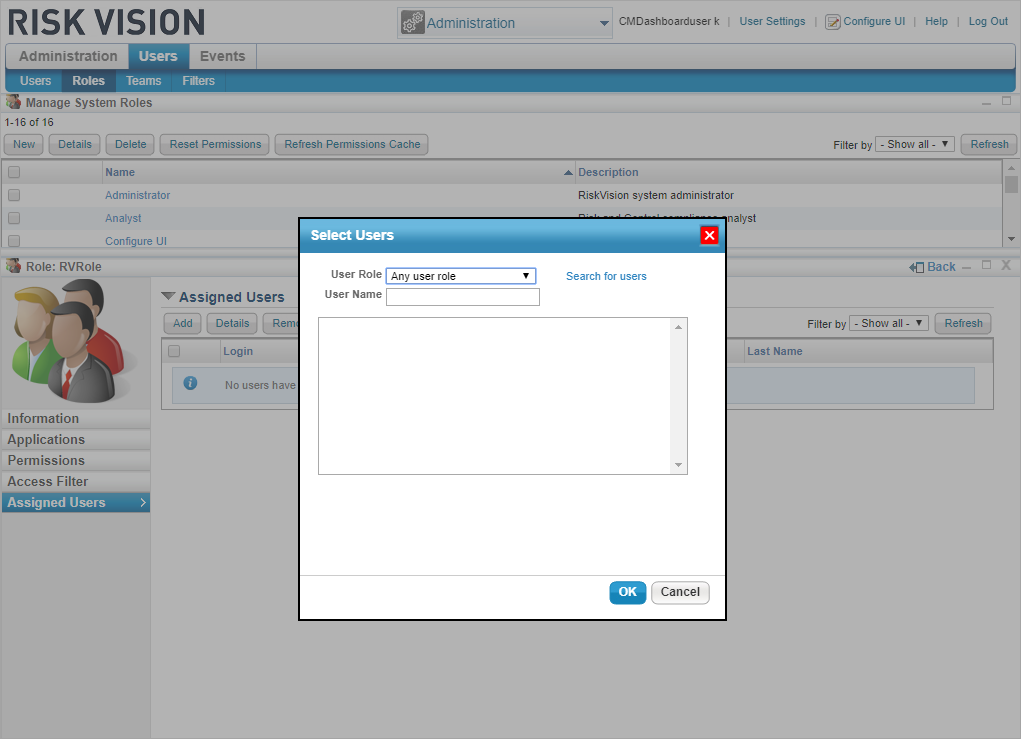
Adding a user to a role in RiskVision.
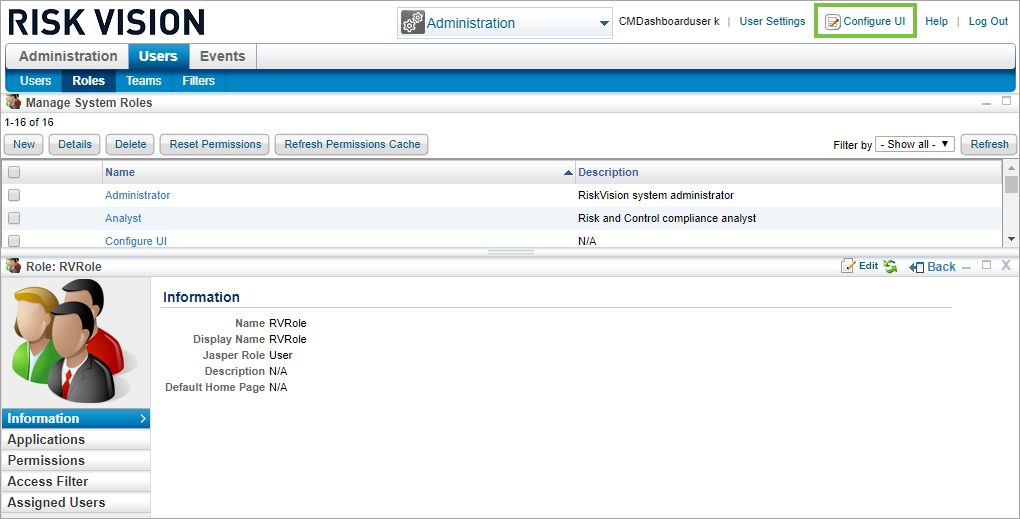
- Click Information in the menu to the left.
- Click Configure UI to enable Configuration mode, then click OK to close the confirmation message.
The Information section of the role's settings.
- Click the
 icon beside the Jasper Role field to open the Configure attribute window.
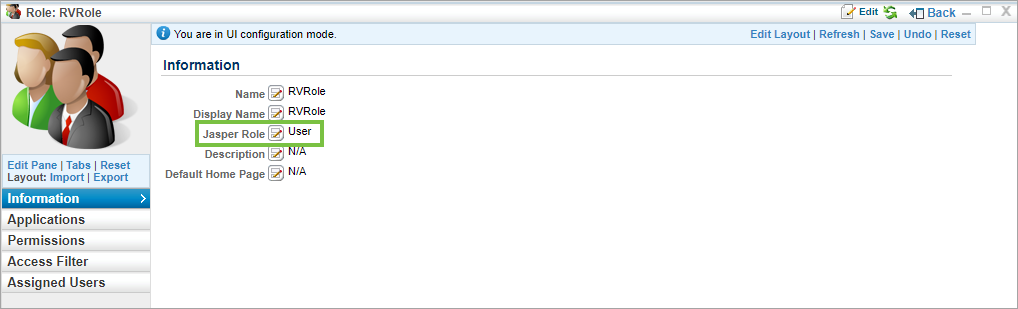
The Jasper Role field in the Information settings of the role.
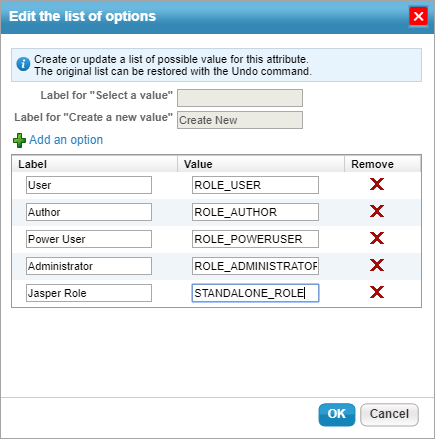
- Click Edit Options.

The Configure attribute window.
- Click
 Add an option.
 - Enter a label in the Label field and type the exact name of the Jaspersoft role created in step 3 above in the Value field.
Adding the Jasper
- Click OK to close attribute windows and save your changes.
- Click Configure UI (active) in the top-right corner of the page to disable Configuration mode, then click OK to save your changes.
- Navigate to Jaspersoft > View > Repository, ensuring you're still logged into Standalone.
- Expand the RiskVision folders in the Folders tree to the left to display the folders you wish to apply role permissions on.
- Right-click a folder, then select Permissions.
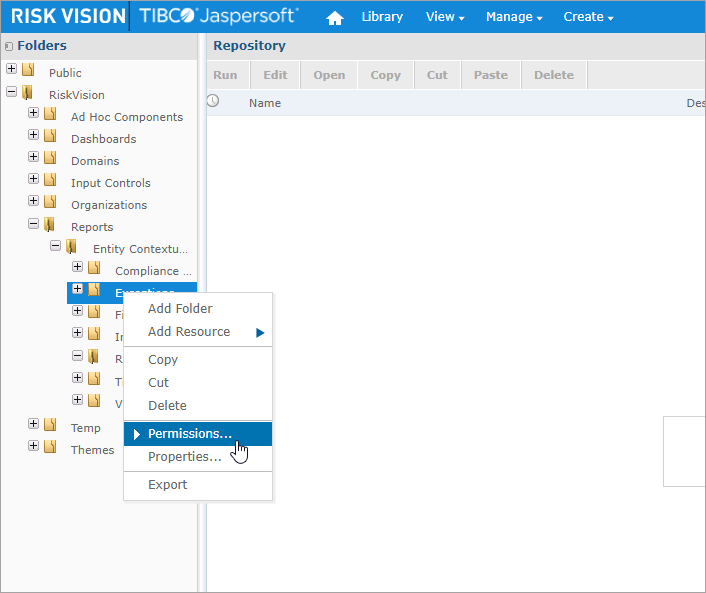
The Repository settings in Jaspersoft where you can apply role-specific permissions to each folder.
- Apply permissions on the folder for the role created in step 3 above as needed. Note that RiskVision roles are automatically assigned the ROLE_USER role in Jaspersoft and this role cannot be removed, but its settings may be overridden by following the instructions below:
- To deny access to a folder, assign No Access permissions on the ROLE_USER role and the RiskVision role.
- To provide read-only access to a folder, assign No Access permissions on ROLE_USER role and Read Only access the folder on the RiskVision role.
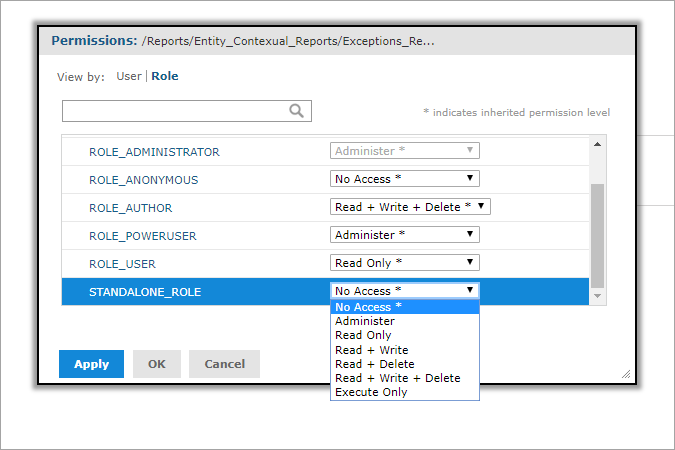
Permission settings for a folder.
- Click Apply to save your changes.

Related Articles

New Articles


 icon beside the Jasper Role field to open the Configure attribute window.

 Add an option.

