
Each vendor in your system is represented as an entity and has a vendor account. When you add a vendor, RiskVision creates an entity and an account.
You can add, remove, and update general information for the vendor, such as their name and address, from either the vendor's entity details or the vendor's account on the Users & Roles page.
Creating a new vendor requires Vendor View, Vendor Create, Vendor Service View, and Vendor User View permissions.
To create a new vendor:
Go to Vendors > Vendors. Select a group of vendors.
Click New Vendor.
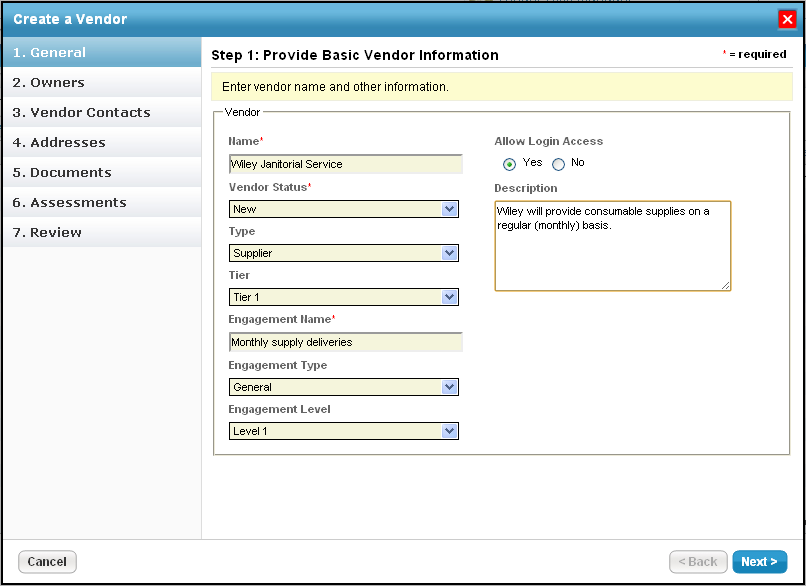 The Create a Vendor wizard.
- Enter the following fields:
Parameter Description Name The name used to identify this vendor across all engagements. Vendor Status Click New for a new vendor relationship. Type Optional. Select the vendor type. Tier Optional. Some organizations classify vendor relationships with tiers. Engagement Name A vendor relationship can comprise many engagements. Enter a name for the first engagement. Once the vendor is created, create additional engagements as needed. Engagement Type Optional. Specify the type of the first engagement. Engagement Level Optional. Some organizations classify engagements into levels. Allow Login Access Will this vendor be granted access to the RiskVision system? If you choose No, a user with RiskVision access will need to update the vendor and engagement information. Description Enter an optional description to be associated with this vendor. Note that you can upload contracts, SLAs, PDF brochures and other materials in a later step. Click Next.
Enter the owner information. Owners are people on the organization side who manage the relationship with the new vendor. By default, the user who creates the vendor is the Primary Owner, but you can select another user to be the Primary Owner. You can also select others in the organization who will be authorized to update the vendor's status.
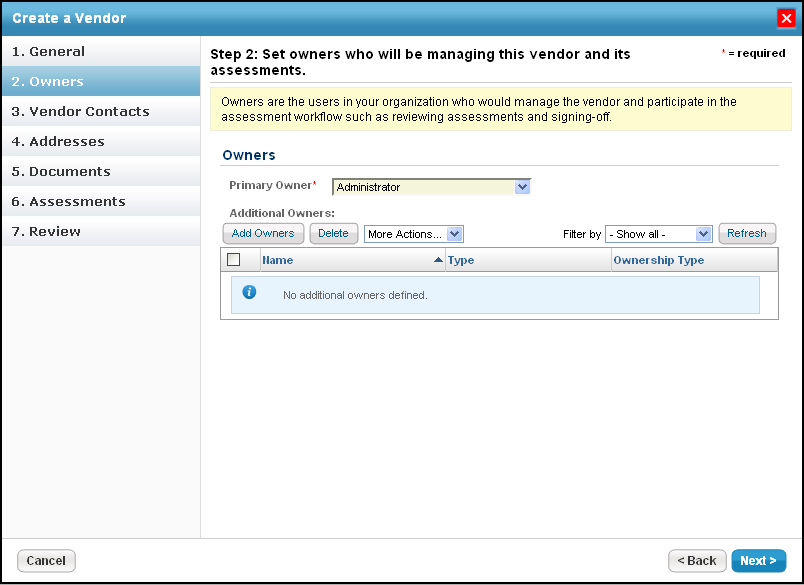 The Owner wizard page.
Click Next.
The Vendor Contacts wizard page appears. Enter contact information and an initial password for the primary vendor contact. The primary vendor contact must change their password the first time they log in. Note that the initial password is subject to minimum length and other password constraints.
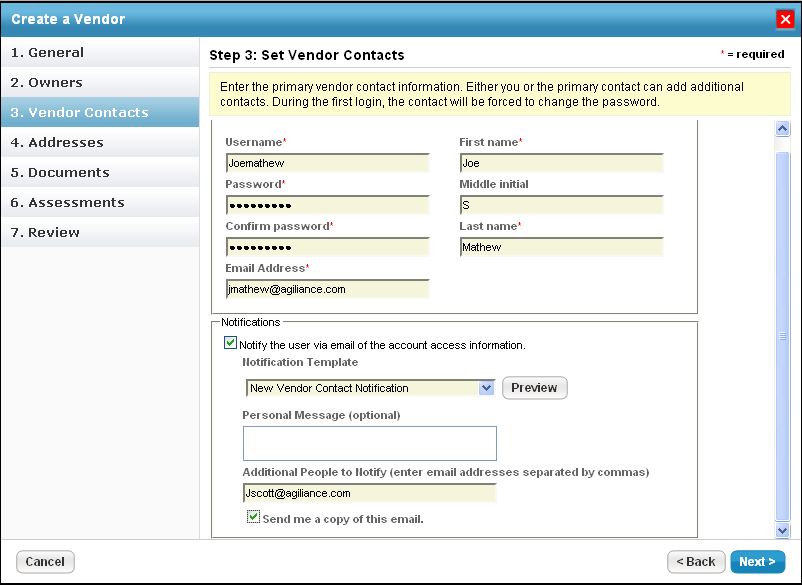
The primary vendor contact is given the Vendor Administrator role. You, or the new primary vendor contact, can add additional vendor users later.
Click Next.
Enter the primary and billing addresses for the new vendor, or check the Do not maintain addresses for this vendor checkbox. You can add addresses for the vendor at any time.
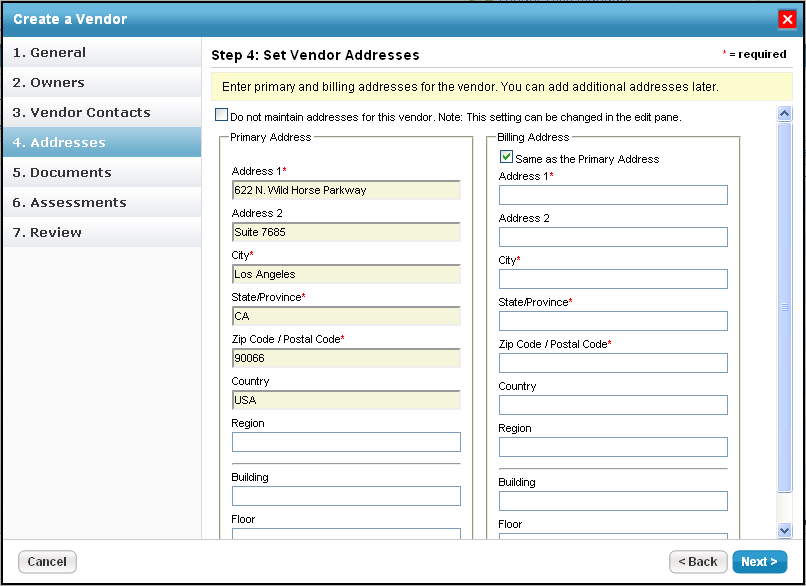 The Address wizard page.
Click Next.
Optional: New vendors often have contracts or SLAs associated with them, or your organization may have a relevant policy or SOP document. Attach documents by:
- Uploading new documents;
- Referencing documents already in the Document Repository;
Adding links to web pages; or
Adding a Nework Path.
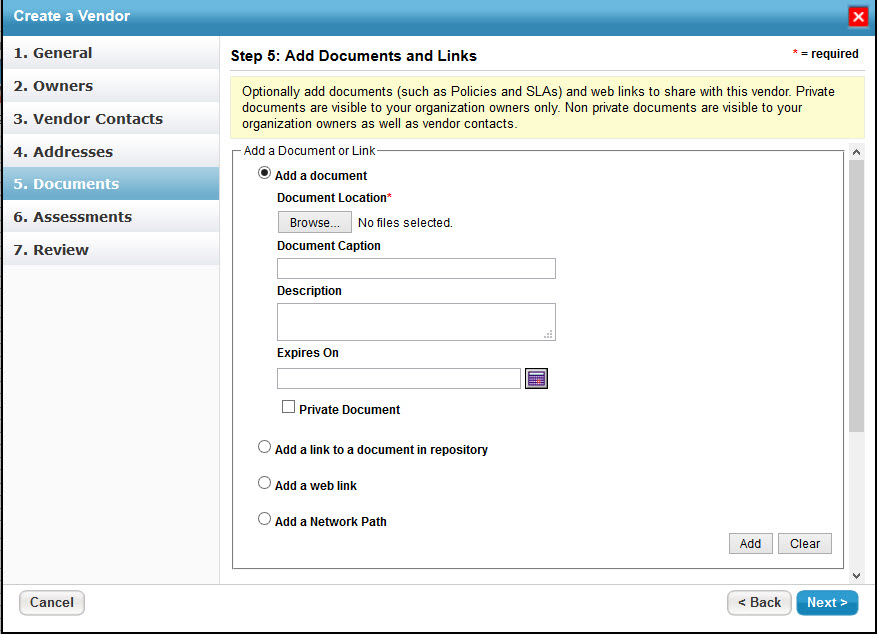 The Document wizard page.
Click Next.
Select the Add to ongoing Program, Create a new Program to assess with, or Do not assess at this time radio button. If you choose to add the vendor to an ongoing program, the assessment will only be created for the engagement. If you choose to create a new program, the new program wizard will start as soon as you finish the new vendor wizard.
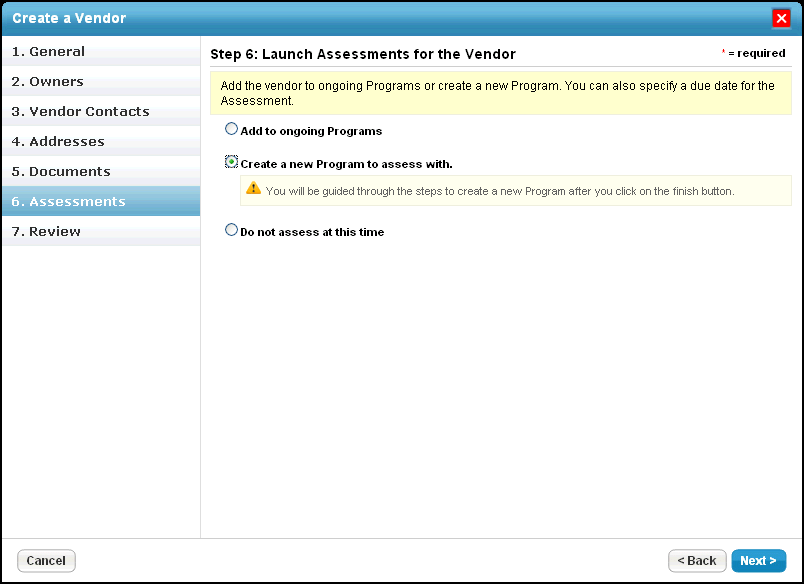 The Assessments wizard page.
Click Next.
Review the new vendor details.
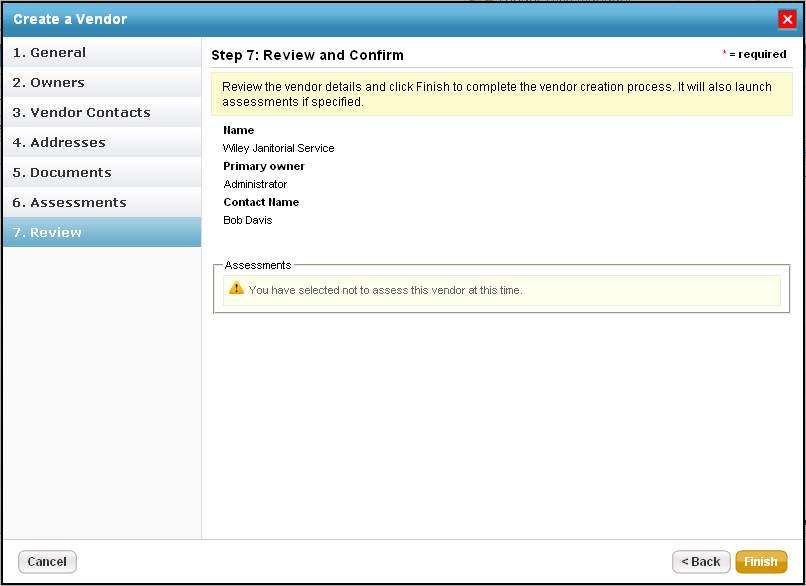 The Review wizard page.
- Click one of the following buttons:
- Finish: Create the new vendor.
- Back: Make changes.
- Cancel: Cancel the creation of a new vendor.


