
While it is possible to create a content pack within RiskVision through the user interface, this can be a time-consuming process depending on the quantity of controls and subcontrols. To save time, users can import their own content packs into RiskVision using the Excel Content Pack Import Template.
It is important to note that the content imported using this template must conform to the following structure:
Content Pack
Control Objective
Control
Subcontrol
If the imported content has a different structure, you may be able to change the content's structure after importing it. For example, control objectives can be changed to control groups by selecting the control objective in RiskVision and clicking the Promote to Group button.
To import a content pack:
Navigate to the Administration application.
Click Documentation on the left side of the screen.
Click Core Content Import Template to download the import template.
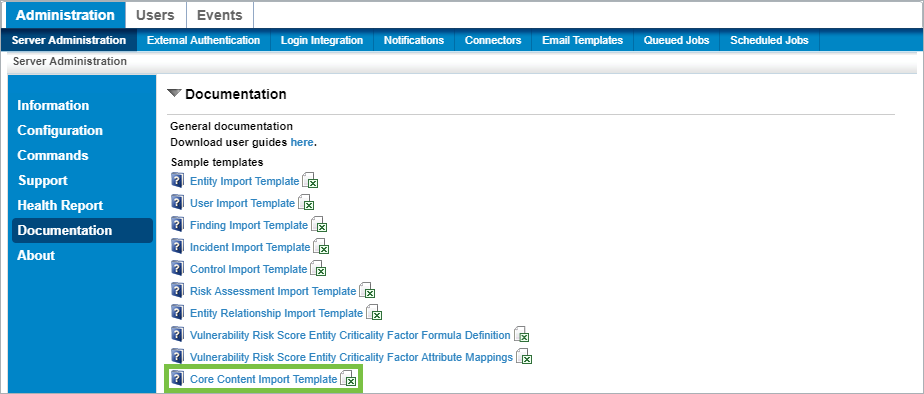 The Core Content Import Template on the Documentation page.
Open the import template.
To create the content pack:
Navigate to the Authority Document tab of the workbook.
Enter the content pack's identifying code under External Ref ID. Users can enter an alphanumeric string including spaces and capitals with no character limit.
Enter the content pack's name under Name.
Optional: Enter a description for the content pack under Description.
Leave the space under Library Workflow blank.
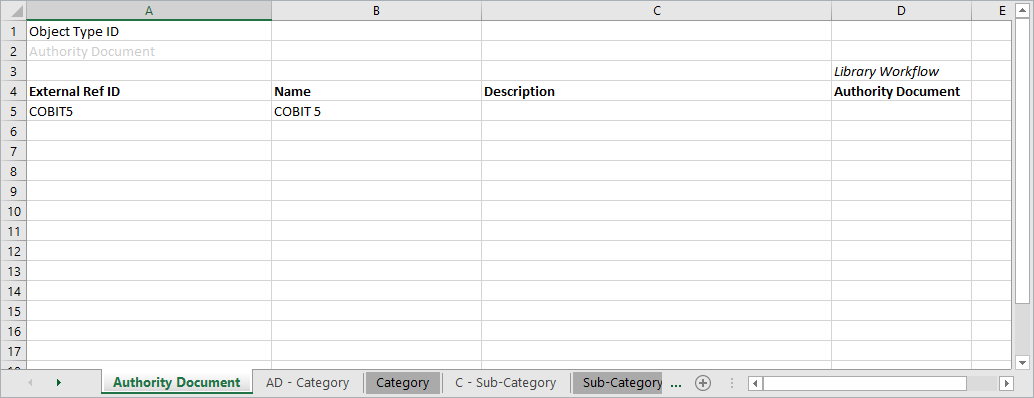 The Authority Document spreadsheet.
To create the control objectives:
Navigate to the Category tab of the workbook.
Enter each control objective's identifying code under External Ref ID. Users can enter an alphanumeric string including spaces and capitals with no character limit.
Enter the name of each control group under Name.
Optional: Enter a description for each control group under Description.
Optional: Enter the area each control group pertains to under Area.
Leave the space under Library Workflow blank.
 The Category spreadsheet.
To map control objectives to the content pack:
Navigate to the AD - Category tab of the workbook.
Enter the content pack's identifying code from step 5b under OB1 Ext Ref ID. Repeat this step as many times as there are control objectives to be mapped to the content pack. For example, if the content pack has five control objectives, enter the ref ID five times.
Optional: Enter the name of the content pack under Object Name in column B. This is for user reference only.
Enter the identifying code for each control objective from step 6b under OB2 Ext Ref ID.
Optional: Enter the name of each control objective under Object Name in column D. This is for user reference only.
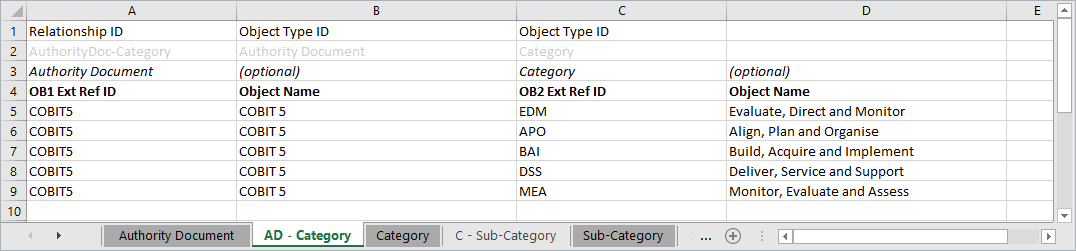 The AD - Category spreadsheet.
To create controls:
Navigate to the Sub-Category tab of the workbook.
Enter each control's identifying code under External Ref ID. Users can enter an alphanumeric string including spaces and capitals with no character limit.
Enter the name of each control under Name.
Optional: Enter a description of each control under Description.
Optional: Enter the Purpose Statement, IT-Related Goal, and Process Goal of each control under the appropriate column. The content of these fields will appear under the Sub-Category's description field in RiskVision.
Leave the remaining columns blank.
 The Sub-Category spreadsheet.
To map controls to control objectives:
Navigate to the C - Sub-Category tab of the workbook.
Enter the identifying code for each control objective from step 6b under OB1 Ext Ref ID. Make a copy of each ID for every control being mapped to the control objective. For example, if the EDM objective contains five controls, enter EDM five times in the column.
Optional: Enter the name of the control objective under Object Name in column B. This is for user reference only.
Enter the identifying code for each control from step 8b under OB2 Ext Ref ID. Ensure each control is in the same row as its corresponding control objective.
Optional: Enter the name of the control under Object Name in column D. This is for user reference only.
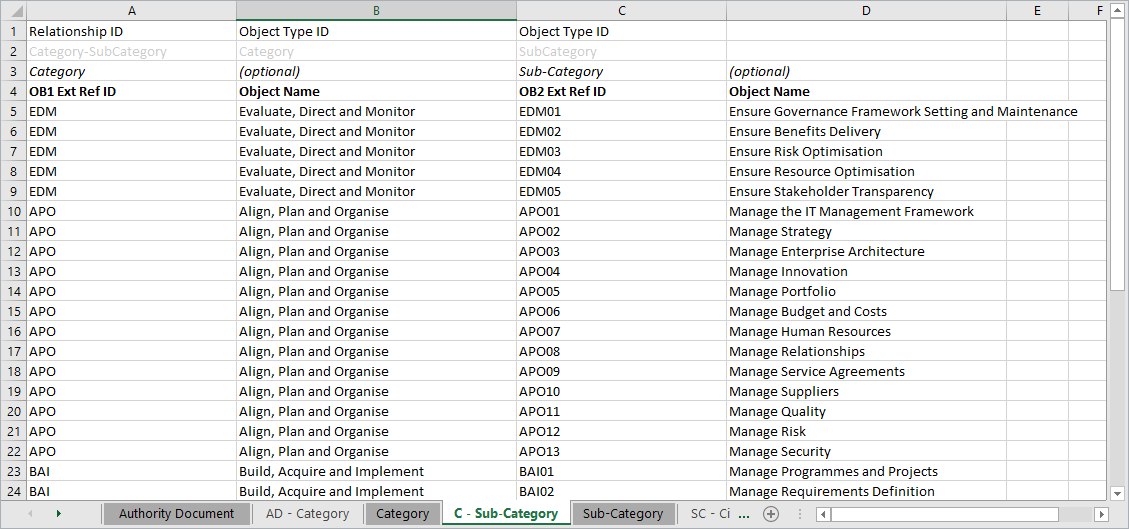 The C - Sub-Category spreadsheet.
To create subcontrols:
Navigate to the Citation tab of the workbook.
Enter each subcontrol's identifying code under External Ref ID. Users can enter an alphanumeric string including spaces and capitals with no character limit.
Enter the name of each subcontrol under Name.
Optional: Enter the description of each subcontrol under Description.
Optional: Enter the activities to be performed by each subcontrol under Activity. The content of these fields will appear under the subcontrol's description field in RiskVision.
Leave the remaining columns blank.
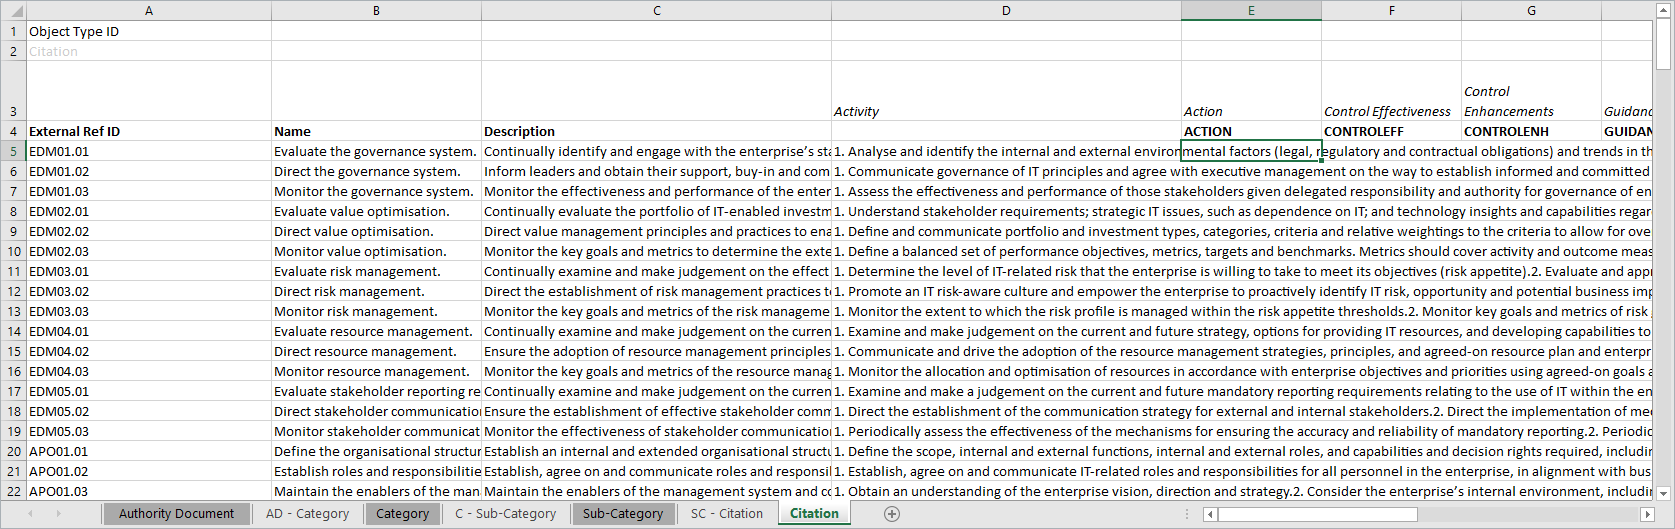 The Citation spreadsheet.
To map subcontrols to controls:
Navigate to the SC - Citation tab of the workbook.
Enter the identifying code for each control from step 8b under OB1 Ext Ref ID. Make a copy of each ID for every sub-control being mapped to the control. For example, if EDM01 has three sub-controls, enter EDM01 three times in the column.
Optional: Enter the name of the control under Object Name in column B. This is for user reference only.
Enter the identifying code for each subcontrol from step 10b under OB2 Ext Ref ID. Ensure each subcontrol is in the same row as its corresponding control.
Optional: Enter the name of each subcontrol under Object Name in column D. This is for user reference only.
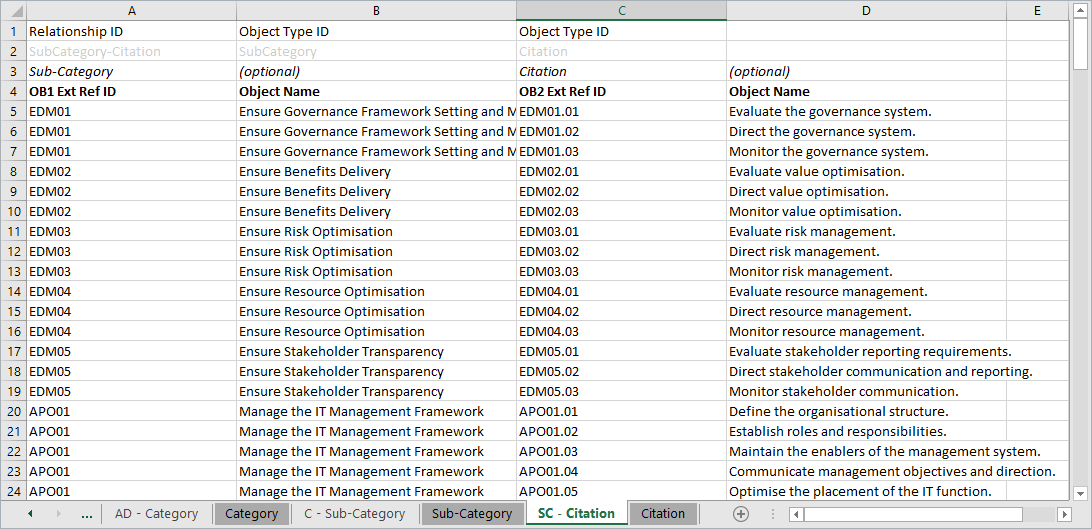 The SC - Citation spreadsheet.
Navigate to the server\config\agiliance.properties file and place the following property:
ui.import.coreContent=trueSkip step 12 if the property has already been placed in the file. In RiskVision, navigate to Content > Controls and Questionnaires.
Click Import Core Content.
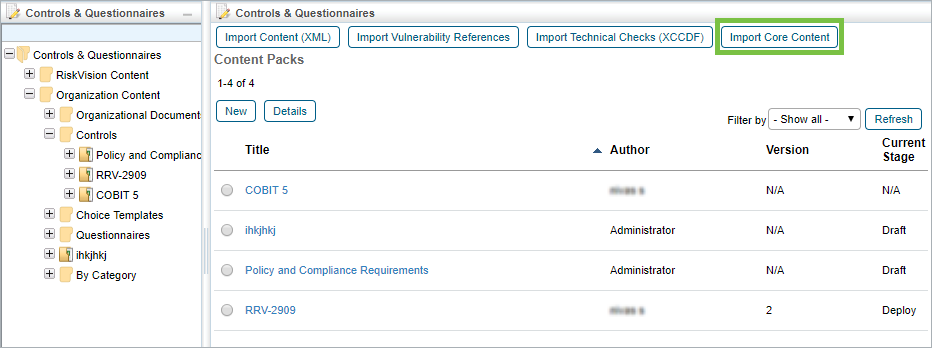 The Import Core Content button.
The imported content pack can be accessed under Organization Content > Controls in the tree view.
 The newly imported content pack.


