
You can install the RiskVision Server components on the single server. This kind of setup is appropriate for small-scale enterprises with a relatively small number of assets. RiskVision offers a third-party business intelligence tool called JasperReports Server that you can use for building sophisticated charts and dashboards.
We do not recommend running MySQL, Apache2, or Tomcat for programs other than RiskVision on the target system. If any conflicting servers are installed, stop them before beginning the RiskVision installation process. The Help icon shows the installation steps in the Installer wizard.
To install the RiskVision Server:
Disable User Account Control before you begin the installation if you're using Windows Server 2008 or 2012. You may re-enable this feature after installation if required
Go to Administrative Tools > Local Security Policy > Local Policies > Security Options.
Double-click ser Account Control: Run all administrators in Admin Approval Mode.
Click the Local Security Setting tab.
Click Disabled.
Click OK.
Reboot the host.
Double-click the
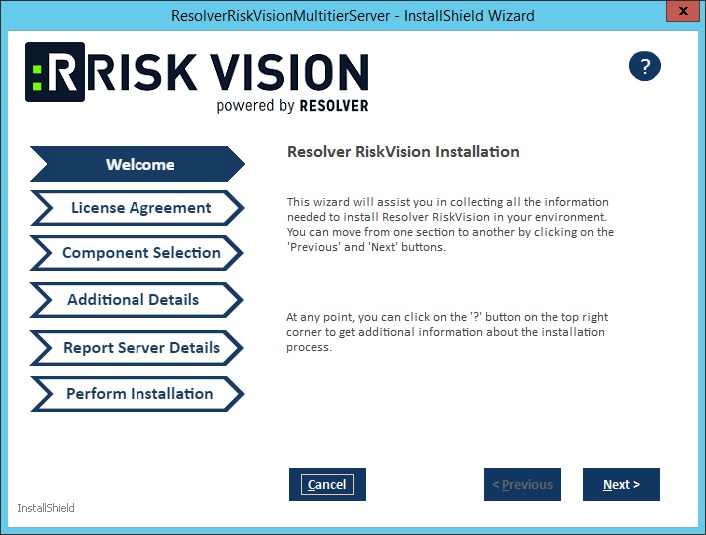
RiskVisionApplicationServerInstallation.exeto open the InstallShield wizard.Click Next.
Click I accept the terms of the license agreement.
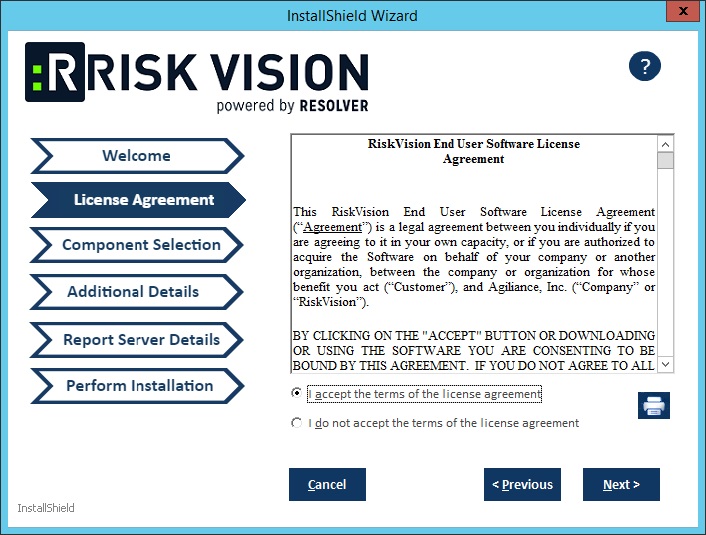
- Click Next.
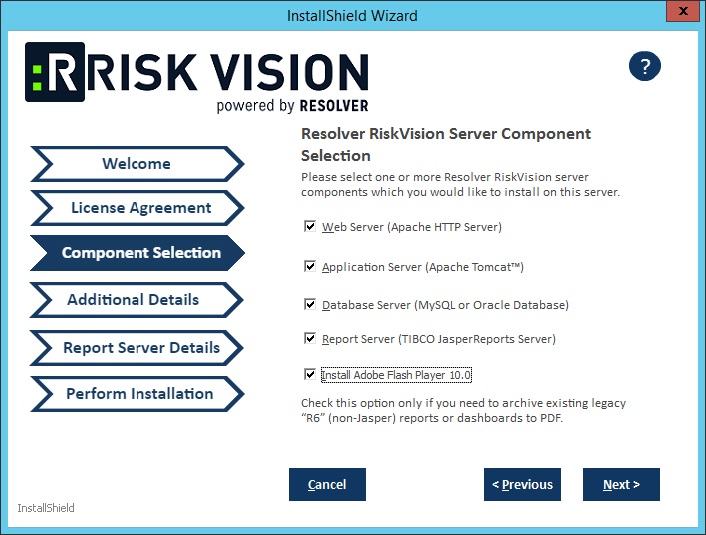
- Click the Web Server, Application Server, Database Server, and Report Server checkboxes. This will install the Apache HTTP Server, Apache Tomcat application server, database server (MySQL), TIBCO Jasper Report Server and Apache open office. If you need to set up RiskVision Server using an Oracle database, see Oracle Database Pre-Installation.
Click Next.
Select the MySQL 5.7.24 or Oracle 12.2.01 radio button to indicate the database type.

MySQL Database:
Click the Root user password field and enter a password for the root user.
Click the Agiliance user password field and enter a password for the Agiliance user.
Click Next. A warning message may appear if the required TCP ports are used by the server where you are currently running this installer. If the warning message appears, click Cancel, then click Next to stop the installation, or click Ignore, then click Next to continue.
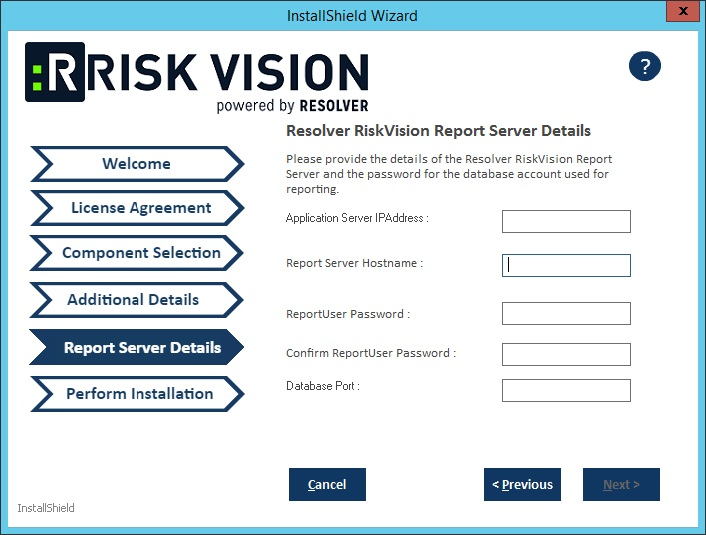
Click the Application Server IPAddress field and enter the location of the application server IP address.
Click the Application Server Hostname field and enter the location of the application server hostname.
Enter a password for the reportuser user in the ReportUser Password field and reenter the same password in the Confirm ReportUser Password field to ensure that the password you entered is correct. You will need to input the password again in the database.
Enter the database port number, in the Database Port field.
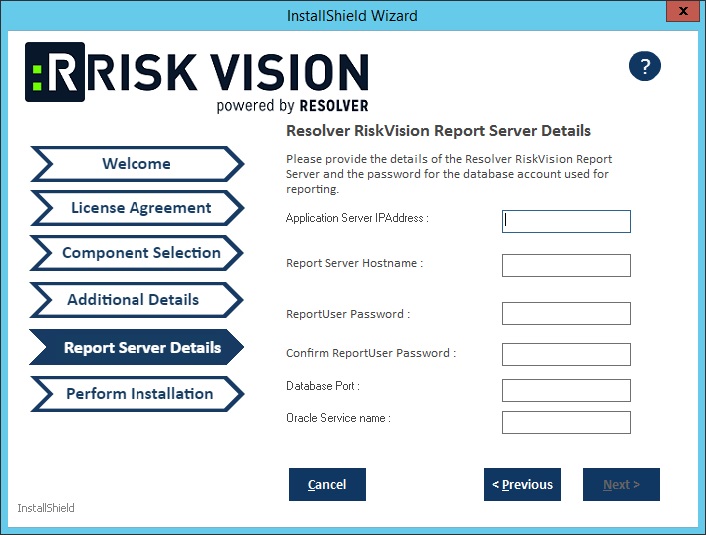
Oracle Database:
Click Next to open the Report Server Details page.
Enter the application server IP address in the Application Server IP Address field.
- Click the Application Server Hostname field and enter the location of the application server hostname.
- Enter a password for the reportuser user in the ReportUser Password field and reenter the same password in the Confirm ReportUser Password field. You will need to input the password again in the database.
- Enter the database port number in the Database Port field.
- Enter the Oracle service name in the Oracle Service Name field.
- Click Next to open the Perform Installation page.
- Optional: Click Browse to change the installation path. By default, components will be installed in the directory
C:\Server. If you have changed the installation path, ensure you have at least 100 GB of free disk space for installing RiskVision Server and Report Server.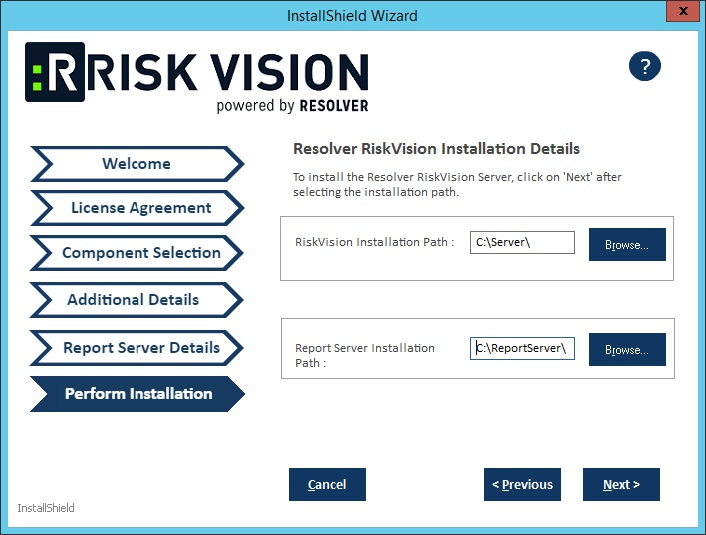
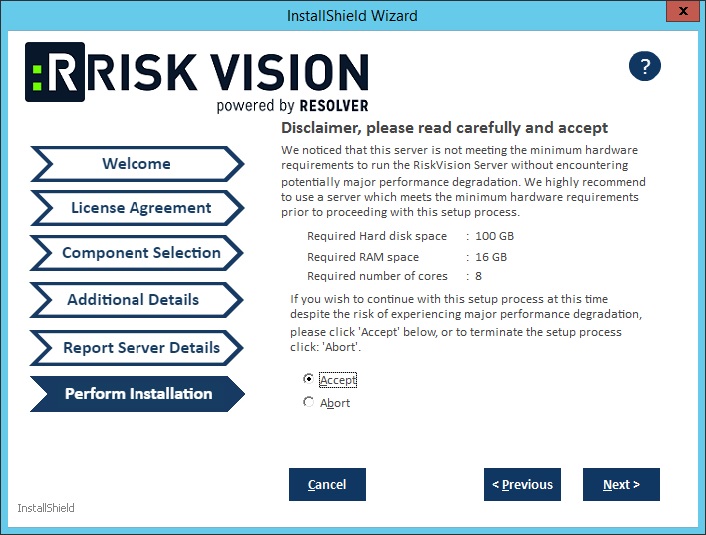
- Click Next to open the Begin Installation wizard. If the server where you are currently running the installer does not meet the system and hardware requirements, the Disclaimer page will open. Continuing the installation without proper hardware could severely affect performance. Refer to the Minimum Hardware Requirements page for more information. To disregard the Disclaimer page, click Accept, then click Next.
The installer sets the environment variable to
%AGILIANCE_HOME%the product install path specified here. The default install directory isC:\Server. From this point forward, the install directory is referred to as%AGILIANCE_HOME%.The path%AGILIANCE_HOME%must not contain spaces. Click Next.
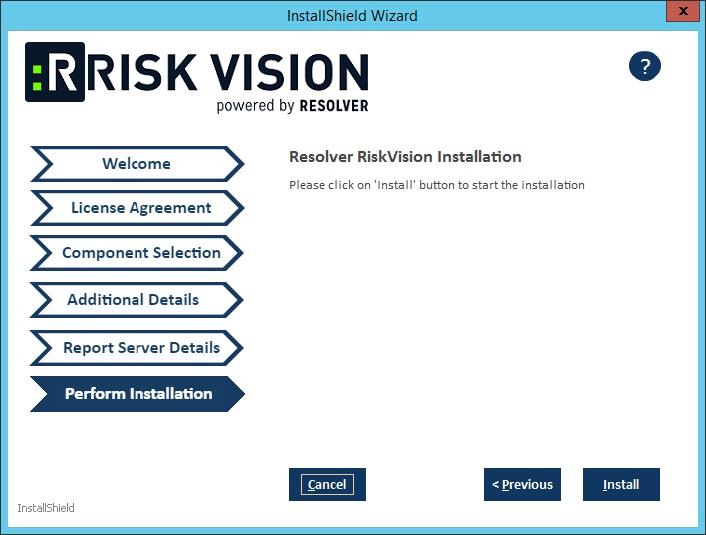
Click Install.
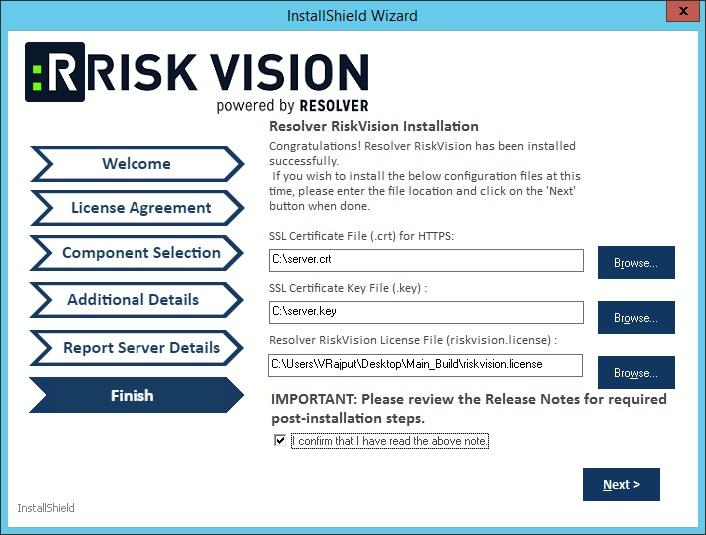
Review the path to your SSL Certificate File, SSL Certificate Key, and Resolver RiskVision License File.
Review the Release Notes for the post-installation steps, then check the I confirm that I have read the above notes checkbox.
Click Finish.
Click Next.
Click Finish to complete the installation if you are using a MySQL database. The application servers, MySQL database, web server, and report server are now installed. If you are setting up the RiskVision Server on an Oracle database, see Setting up Oracle Database.

If a command window opens while the scripts are running, do not close it. The window will close by itself. 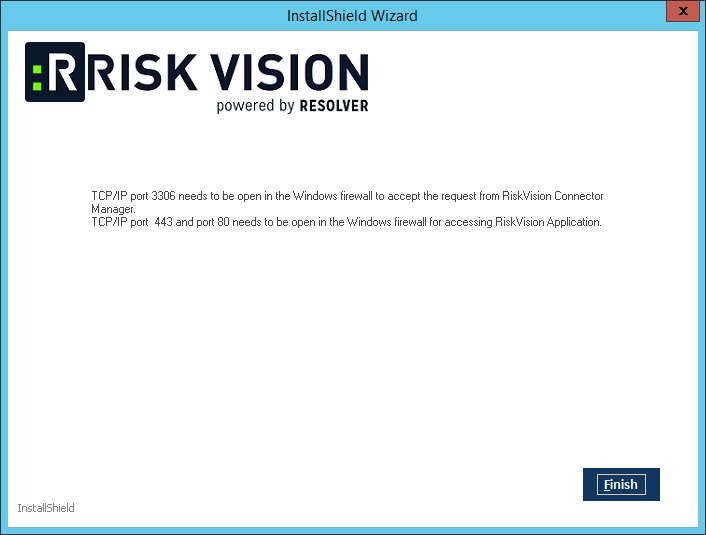
If the installation fails, consult the installation log file ( Install.log)in the folder where RiskVisionApplicationServerInstallation.exe was executed. This file captures the output and results of the installation scripts.


