
Create a response to mitigate the finding score or to override the compliance score.
To create a response:
- Open the questionnaire by clicking the questionnaire in My Assessments or by navigating to Home > Questionnaires and selecting Work on this Questionnaire or Resume Questionnaire from the actions menu in the questionnaire's row.
- In the Questionnaire window, for a control, select the sub-control. If there is more than one subcontrol, a table displays. Select the subcontrol title to open the question.
The question appears.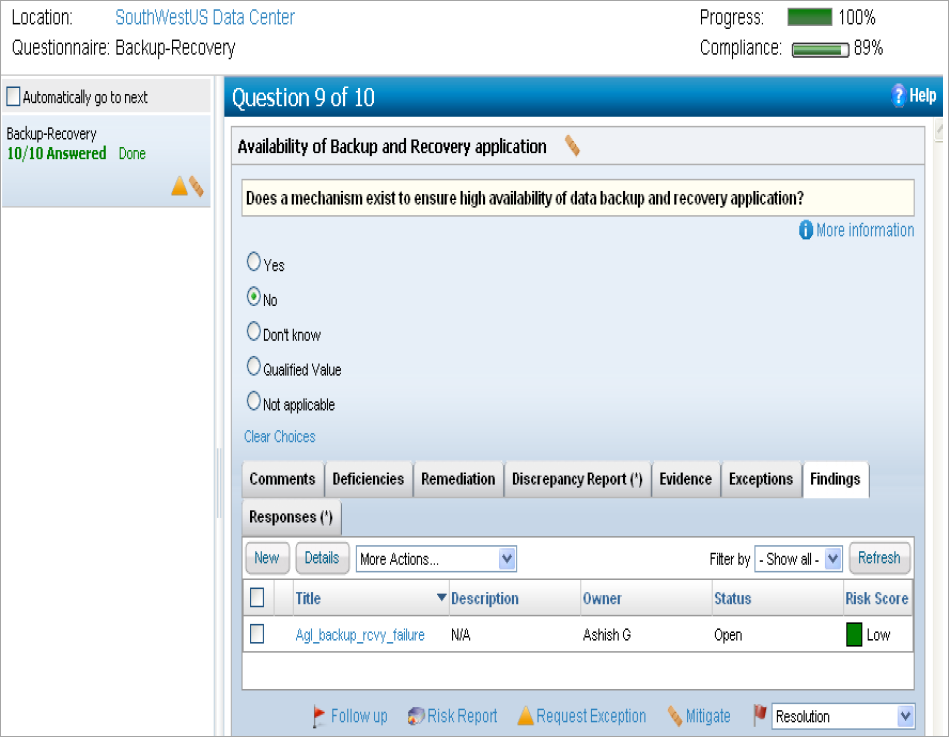
- Create a response.

- To mitigate the finding score, click the Findings tab, select a finding to open its details and then click the Responses tab. Create a finding first if a finding you want to respond does not appear. For information about how to create a finding, see Creating Findings.
Or - To override the compliance score, click Mitigate.
- The New Response wizard appears.
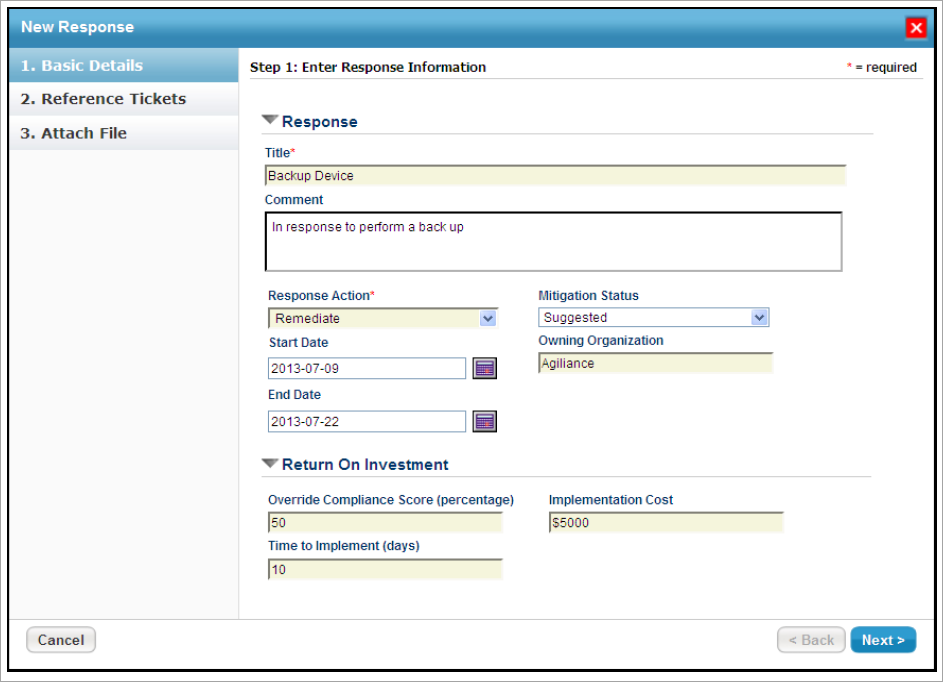
In the Basic Details wizard page, expand the Response section, enter a name in the Title field, enter text in the Comments field to provide information about the need to create a response, select a value in the Response Action and Mitigation Status drop-down boxes, specify a date in the Start Date and End Date fields, and enter a name in the Owning Organization field.Then expand the Return of Investment section, enter a percentage value in the Override Compliance Score (percentage) field, enter a value in the Implementation Cost field to forecast the implementation cost, and enter a value in the Time to Implement (in days) field to calculate the effort.
There are a number of response actions, depending on the specifics of a finding. Response actions include:

- Compensate
- Mitigate
Click Next to Continue.
- The Reference Tickets wizard page appears. To link tickets, select the box next to the Link an existing or new Ticket with this Response option. You can link an existing ticket or a new ticket that will help track this response.
Select existing Tickets. Select this option to link existing tickets. In the Available Tickets box, select the box corresponding to each row, and click >> so that tickets are moved to the Selected Tickets box.
Or
Create new Ticket. Select this option to create a new ticket, specific to a response.
Click Next to continue.
- The Attach File wizard page appears. You use the following options to attach files.
Add a document. Allows uploading a document from your local system.
Add a link to a document in repository. Allows providing references to a document collection in document repository.
Add a web link. Allows providing external references.
Click Add followed by each option to upload multiple documents or links.
- Click Finish to add a response. The response is created and appears in the Responses tab of questionnaire window.

