
You can import a RiskVision chart saved in JRXML format. RiskVision charts can be enhanced using the additional features of JasperReports, such as fonts, a query that restricts the report data from displaying additional details and so on.
To import a RiskVision chart:
- Go to Analytics > Analytics and Reporting. The JasperReports Server menu appears.
- On the View menu, click Repository.
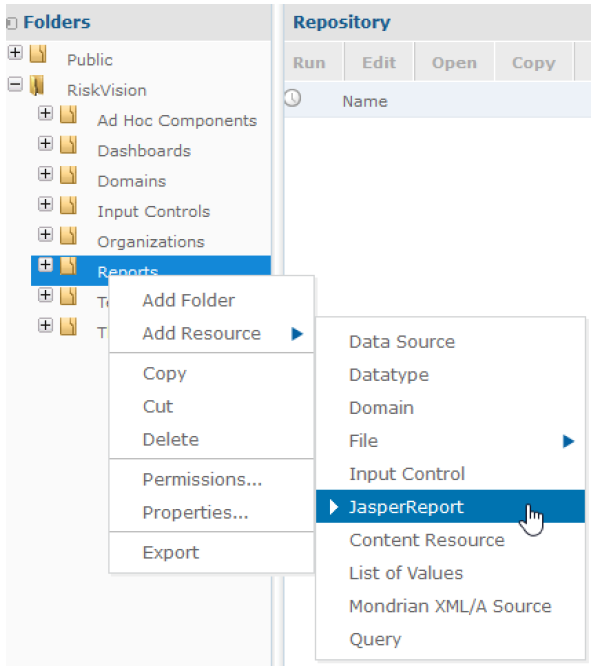
- Expand the folder to locate the desired group where you want to import the chart.
- Right-click the folder and point cursor on Add Resource option to select JasperReport. The Add Resource page appears on the context menu only if you have write permission to the folder.
- In the Setup page that appears, enter Name, Resource ID and optional Description for the report.
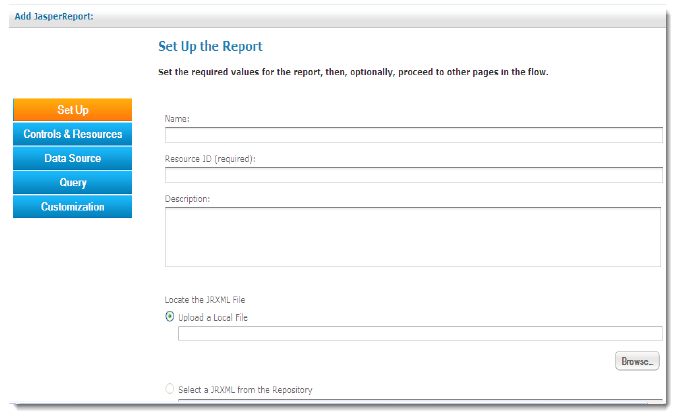
- Locate the JRXML file by selecting Upload a Local File and then click Browse to select the appropriate file.
- Click Controls and Resources. The JasperReports Server uploads the JRXML file to the repository and provide suggestions on missing resources like images, input parameters, and more.
If the exported RiskVision chart contains input parameters, perform the following steps:
Click Add Input Control.
- Choose Select an Input Control from repository and click Browse. In the Select Resource From Repository dialog, expand > Public > Input Controls > Multi Select and select the control.
- In the Select an Input Control from repository, click Select
- In the Add Input Control page, click Next to continue.
- In the Controls and Resources page, check the box next to the Always promptoption, which is available next to the Display Modedrop-down list.
If the exported RiskVision chart contains columns to drill-down, perform the following steps:
- Click Add Input Control.
- Choose Define an Input Control in the next step and click Next.
- In the Create Input Control page, retain the default selection "Single Value" in the Typedrop-down box.
- Enter a label in the Prompt Text (required)field and Parameter Name (required)field. The value to be entered in the Parameter Name (required)field is the name of the parameter found in the .jrxml file (exported RiskVision chart). Click Next to continue.
- In the Locate Datatypes page, Choose Define a Datatype in the next step and click Next to continue.
In the Set the Datatype Kind and Properties page, perform the following steps:
- Retain the default selection "Text" in the Type drop-down box.
- Specify a name for the resource in the Name (required)field and an ID for the resource in the Resource ID (required)field. The value to be entered in the sfield is the name of the parameter found in the JRXML file (exported RiskVision chart).
- Click Save.


- Click Data Sources, choose the Select data source from repository option, and click Browse. In the Select Data Source from Repository dialog, expand the group, select RiskVision under the Data Sources subgroup, and click Select.
For information about how to define a query and customizing a report, see Adding Report Units from JRXML Files in the JasperReports-Server-User-Guide.
- Click Submit to save the report. You can submit the report on any page of the Add JasperReport page.

