
Attributes appear throughout an RiskVision application, you will find them on a page, on a wizard, on a tab, within a section of a tab, and more. The supported attribute types in an RiskVision application are date, encrypted string, flag, image, number, rational number, string, and text. Further, the attributes are classified into two categories: custom attributes and extended custom attributes.
The table below outlines the different available attribute types and their function:
Attributes | Description |
Date | Stores date and time in the YYYY-MM-DD HH:MM:SS format by default |
Encrypted string | Stores a string in encrypted format. |
Flag | Stores Boolean values. |
Image | Stores images |
Number | Stores positive and negative numbers including zero. |
Rational number | Stores an integer (positive and negative) as fraction. |
String | Stores multiple characters. |
Text | Stores character strings and HTML formatting tags. |
Custom Attributes
Attributes that can be added directly from the user interface with Configure UI option are referred as custom attributes. The custom attributes that can be added are readily available on the Layout Designer - Tab/Pane window of an associated object. However, there is a limit on the number of attributes for each type that can be added to the user interface. For example, you can straightaway add up to a maximum of 4 Custom Text attributes, named sequentially from Custom Text 1 to Custom Text 4, to the user interface. For information about how to add custom attributes, see Adding attributes in the section, " Customizing the Layout and Tab."
Please note that the use of custom attributes may affect the scalability and performance of the RiskVision application. The magnitude of the effect will depend on various factors, such as the number of custom attributes added, the number of object instances of the object that will have the custom attributes added to it, and the specifications of the system on which you have installed RiskVision. RiskVision recommends that you test any changes before deploying them to production and that, if you are not already engaged with RiskVision Services or a partner, that you consider an engagement, depending on the magnitude of the considered changes.
Extended Custom Attributes
In addition to the available count of custom attributes on the Layout Designer - Tab/Pane window, the RiskVision application supports many more attributes by customization of the exported user interface changes. The code changes to the exported user interface that will result in new attributes are referred as extended custom attributes. Now, you will learn how to add an extended attribute to an user interface. The steps that will walk you through the procedure to add an extended custom text attribute considers an entity details page.
To add an extended custom attribute
- Turn on the advance UI configuration mode.
- Select an entity to open its details page.
- Click Export (Layout) at the left-hand side of the details page to export the current UI configuration changes in XML file format.
- A dialog appears and prompts you whether to save or open the file. Save the file.
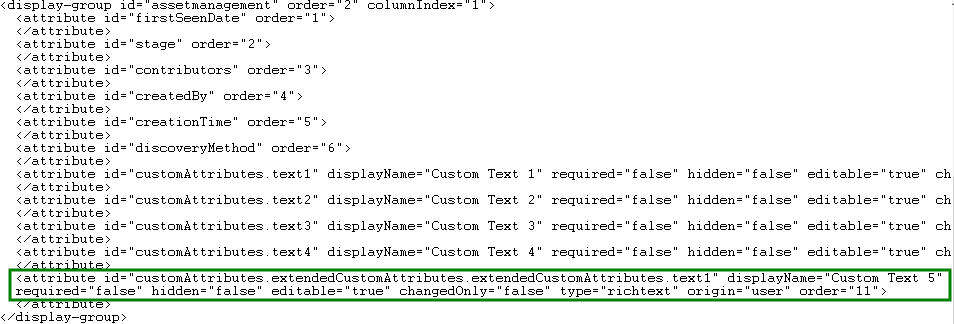
- Open the saved XML file using a text editor, navigate to the group or section element where you want to add an extended custom attribute, and add the following code within the code context of that group or section element:
<attribute id="customAttributes.extendedCustomAttributes.extendedCustomAttributes.text1" displayName="Custom Text 5" required="false" hidden="false" editable="true" changedOnly="false" origin="user" order="11">
</attribute>The following image demonstrates the code changes in the customization file:
Save the customization file.
From within the entity details page, click Import (Layout), browse and select the customization file, and click OK.
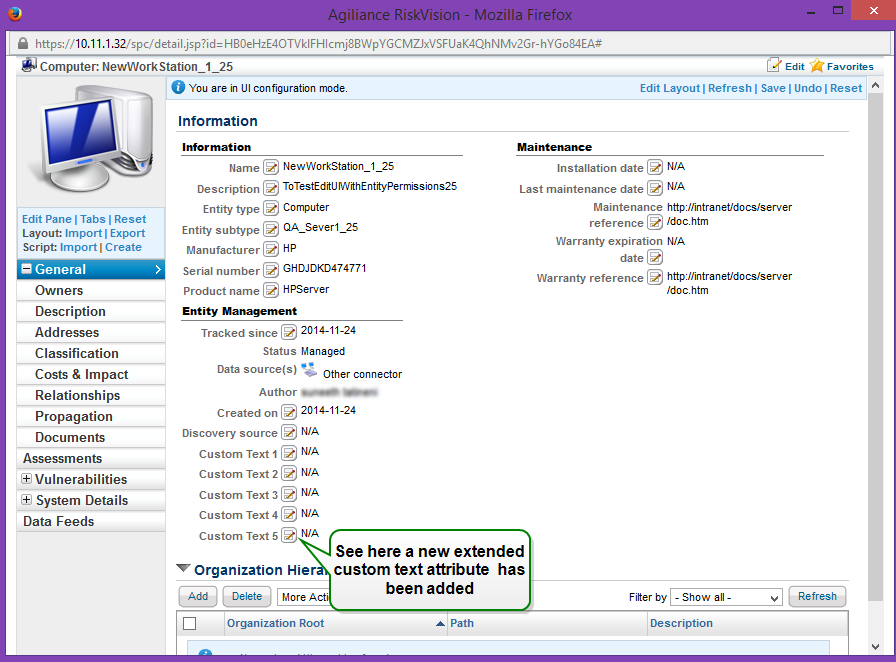
The file is imported successfully and the extended custom text attribute is added.
The following image demonstrates the extended custom text attribute in the entity details page.
Similarly, if you have to add other attribute types, follow the code syntax shown above.
For information about how to save the custom changes permanently, see Retaining the Custom Changes Permanently.


If problems arise due to customizations in your RiskVision environment, please contact your Customer Support Representative.

